How to enable Push Notifications.
Setup Push Notification on iOS
There are three steps to enable push notifications:
- Configure push notifications on Apple Developer Account.
- Enable push notifications in xCode.
- Enable push notifications in app with Marketo SDK.
Configure Push Notifications on Apple Developer Account
- Log into the Apple Developer Member Center.
- Click on “Certificates, Identifiers & Profiles”.
- Click on “Certificates->All” folder underneath “iOS, tvOS, watchOS”.
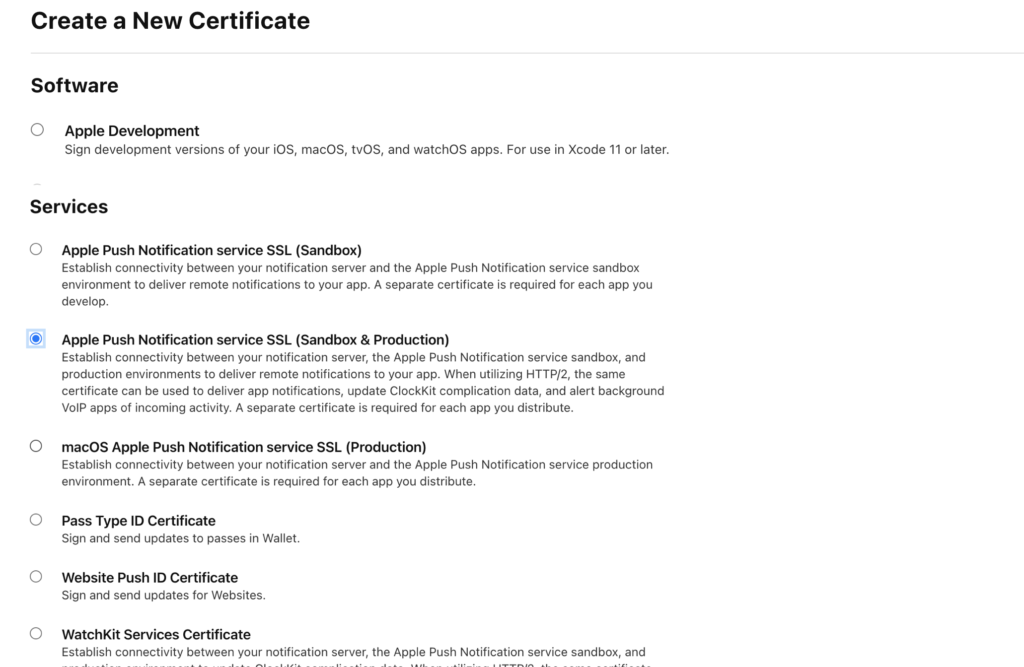
- Select the “+” on the top left screen next to certificates

- Enable “Apple Push Notification service SSL (Sandbox & Production)” checkbox, and click “Continue”.
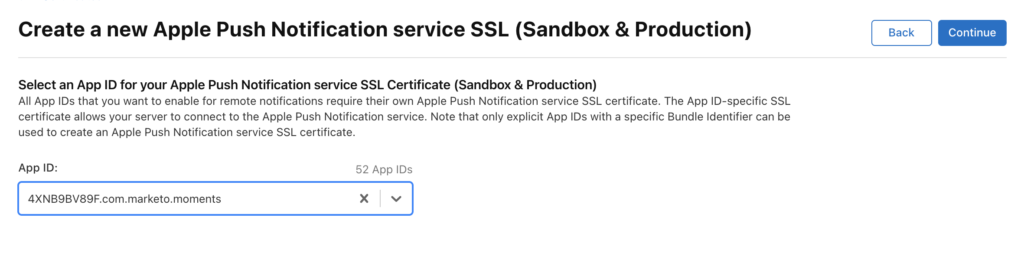
- Select the application identifier that you are using the build the app.
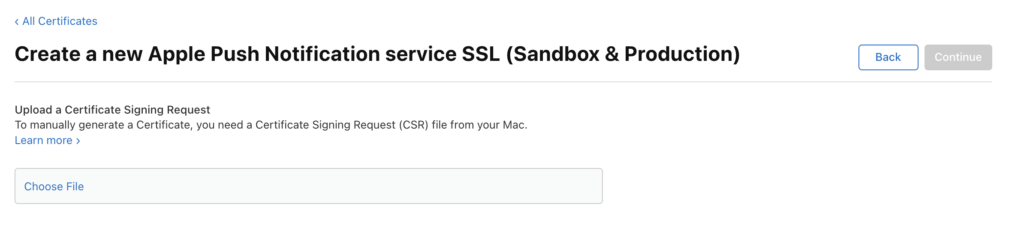
- Create and upload CSR to generate the push certificate.
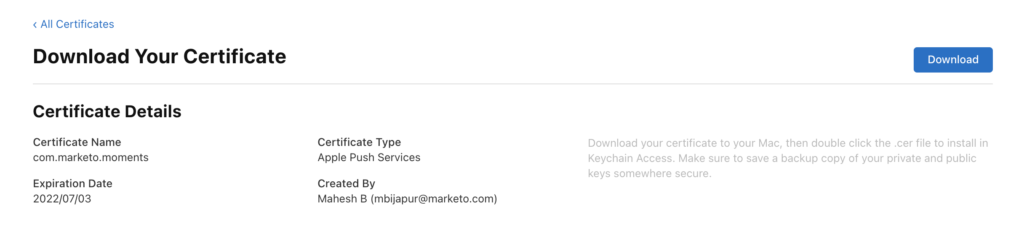
- Download certificate to local computer and double-click to install.
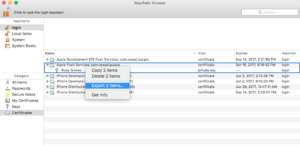
- Open “Keychain Access”, right click on the certificate, and export 2 items into .p12 file.
- Upload this file through Marketo Admin Console to configure notifications.

- Update app provisioning profiles.
Enable Push Notifications in xCode
- Turn on push notification capability in xCode project.

Enable Push Notifications in App with Marketo SDK
Add the following code to AppDelegate.m file to deliver push notifications to your customer’s devices.
Note – If using Adobe Launch extension, use “ALMarketo” as classname
1. Import following in AppDelegate.h.
-
1#import <UserNotifications/UserNotifications.h>
-
1import UserNotifications
2. Add UNUserNotificationCenterDelegate to AppDelegate as shown below.
-
1@interface AppDelegate : UIResponder <UIApplicationDelegate, UNUserNotificationCenterDelegate>
-
1class AppDelegate: UIResponder, UIApplicationDelegate , UNUserNotificationCenterDelegate
3. Initiate Push notification Service
To enable push notification add below code.
-
12345678910111213BOOL)application:(UIApplication *)application didFinishLaunchingWithOptions:(NSDictionary *)launchOptions {UNUserNotificationCenter *center = [UNUserNotificationCenter currentNotificationCenter];center.delegate = self;[center requestAuthorizationWithOptions:(UNAuthorizationOptionSound | UNAuthorizationOptionAlert | UNAuthorizationOptionBadge) completionHandler:^(BOOL granted, NSError * _Nullable error){if(!error){dispatch_async(dispatch_get_main_queue(), ^{[[UIApplication sharedApplication] registerForRemoteNotifications];});}}];return YES;}
-
1234567891011121314func application(_ application: UIApplication, didFinishLaunchingWithOptions launchOptions: [UIApplication.LaunchOptionsKey: Any]?) -> Bool {UNUserNotificationCenter.current().requestAuthorization(options: [.alert, .sound, .badge]) { granted, error inif let error = error {print("\(error.localizedDescription)")} else {DispatchQueue.main.async {application.registerForRemoteNotifications()}}}return true}
Call this method to initiate the registration process with Apple Push Service. If registration succeeds, the app calls your App delegate object’s application:didRegisterForRemoteNotificationsWithDeviceToken: method and passes it a device token.
If registration fails, the app calls its App delegate’s application:didFailToRegisterForRemoteNotificationsWithError: method instead.
4 Register Push Token with Marketo
To receive push notifications from Marketo you must register the device token with Marketo.
-
1234- (void)application:(UIApplication *)application didRegisterForRemoteNotificationsWithDeviceToken:(NSData *)deviceToken {// Register the push token with Marketo[[Marketo sharedInstance] registerPushDeviceToken:deviceToken];}
-
1234func application(_ application: UIApplication, didRegisterForRemoteNotificationsWithDeviceToken deviceToken: Data) {// Register the push token with MarketoMarketo.sharedInstance().registerPushDeviceToken(deviceToken)}
The token can also be unregistered when user logs out.
-
1[[Marketo sharedInstance] unregisterPushDeviceToken];
-
1Marketo.sharedInstance().unregisterPushDeviceToken
Note To re-register the push token extract the code from step 3 into an AppDelegate method and call form the ViewController login method.
5. Handle push notification
To receive push notifications from Marketo you must register the device token with Marketo.
1234- (void)application:(UIApplication *)application didReceiveRemoteNotification:(NSDictionary *)userInfo{[[Marketo sharedInstance] handlePushNotification:userInfo];}
123func application(_ application: UIApplication, didReceiveRemoteNotification userInfo: [AnyHashable : Any]) {Marketo.sharedInstance().handlePushNotification(userInfo)}
6. Add the following method in AppDelegate
By using this method you can either present alert, sound or increase badge while the app is in foreground. You must call completionHandler of your choice in this Method.
-
123456-(void)userNotificationCenter:(UNUserNotificationCenter *)centerwillPresentNotification:(UNNotification *)notificationwithCompletionHandler:(void (^)(UNNotificationPresentationOptions options))completionHandler{completionHandler(UNAuthorizationOptionSound | UNAuthorizationOptionAlert | UNAuthorizationOptionBadge);}
-
12345func userNotificationCenter(_ center: UNUserNotificationCenter,willPresent notification: UNNotification, withCompletionHandler completionHandler: @escaping (UNNotificationPresentationOptions) -> Void) {completionHandler([.alert, .sound,.badge])}
7. Handle newly received Push notification in AppDelegate
The method will be called on the delegate when the user responded to the notification by opening the application, dismissing the notification or choosing a UNNotificationAction. The delegate must be set before the application returns from applicationDidFinishLaunching:.
-
1234- (void)userNotificationCenter:(UNUserNotificationCenter *)centerdidReceiveNotificationResponse:(UNNotificationResponse *)response withCompletionHandler:(void(^)(void))completionHandler {[[Marketo sharedInstance] userNotificationCenter:center didReceiveNotificationResponse:response withCompletionHandler:completionHandler];}
-
123456func userNotificationCenter(_ center: UNUserNotificationCenter,didReceive response: UNNotificationResponse,withCompletionHandlercompletionHandler: @escaping () -> Void) {Marketo.sharedInstance().userNotificationCenter(center, didReceive: response, withCompletionHandler: completionHandler)}
8. Track push notifications
If your app is running in the background (or is not active), then the device will receive a push notification as shown below. Marketo will track when the user taps the notification.

If the device receives a push notification it will be passed to application:didReceiveRemoteNotification: callback on your App delegate.
The following is a Marketo activity log from Marketo that shows app events, and push notification events.

Setup Push Notification on Android
1. Add following permission inside application tag.
Open AndroidManifest.xml and add following permissions. Your app must request the “INTERNET” and “ACCESS_NETWORK_STATE” permissions. If your app already requests these permissions, then skip this step.
1234567891011<uses‐permission android:name="android.permission.INTERNET"/><uses‐permission android:name="android.permission.ACCESS_NETWORK_STATE"/><!‐‐Following permissions are required for push notification.‐‐><uses-permission android:name="android.permission.GET_ACCOUNTS"/><!‐‐Keeps the processor from sleeping when a message is received.‐‐><uses-permission android:name="android.permission.WAKE_LOCK"/><permission android:name="<PACKAGE_NAME>.permission.C2D_MESSAGE" android:protectionLevel="signature" /><uses-permission android:name="<PACKAGE_NAME>.permission.C2D_MESSAGE" /><!-- This app has permission to register and receive data message. --><uses-permission android:name="com.google.android.c2dm.permission.RECEIVE" />
2. Setting up FCM with HTTPv1 (Google has deprecated XMPP protocol on 12th June, 2023 and will be removed in June 2024)
-
- Enable MME FCM HTTPv1 in Marketo feature manager

- Upload Service Account Json file for the app in MLM.
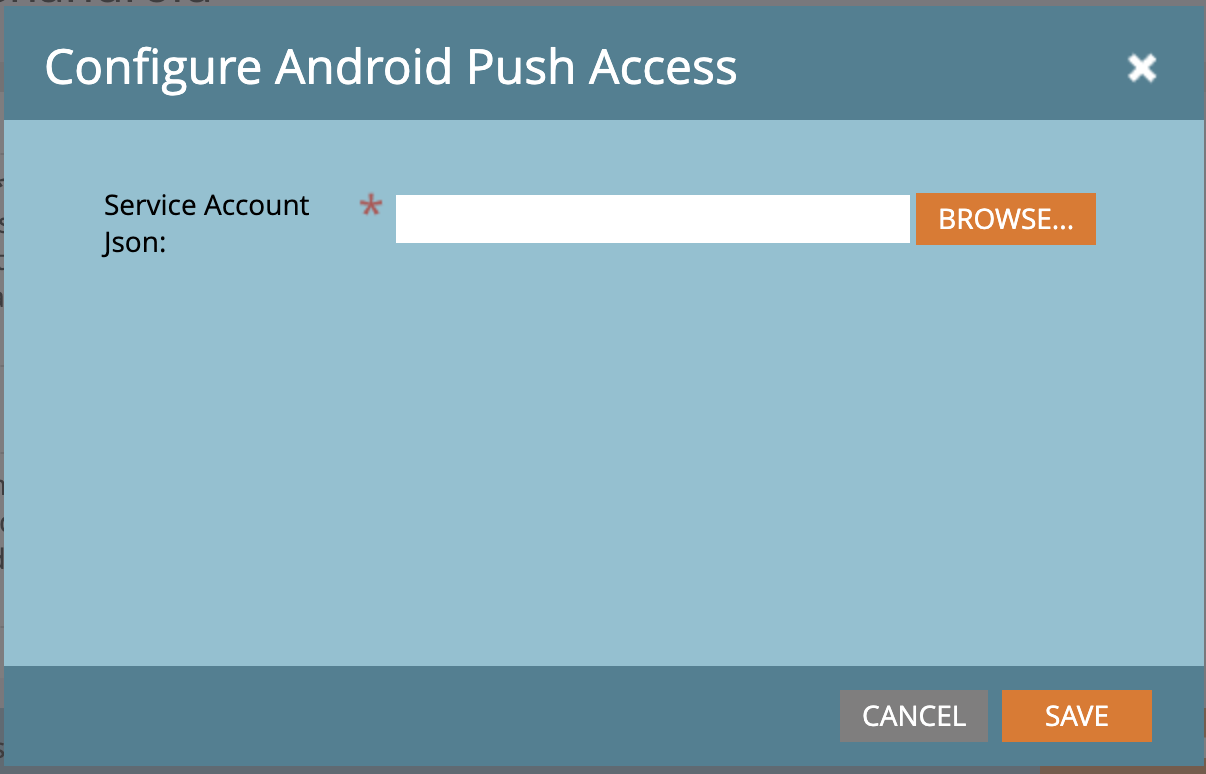
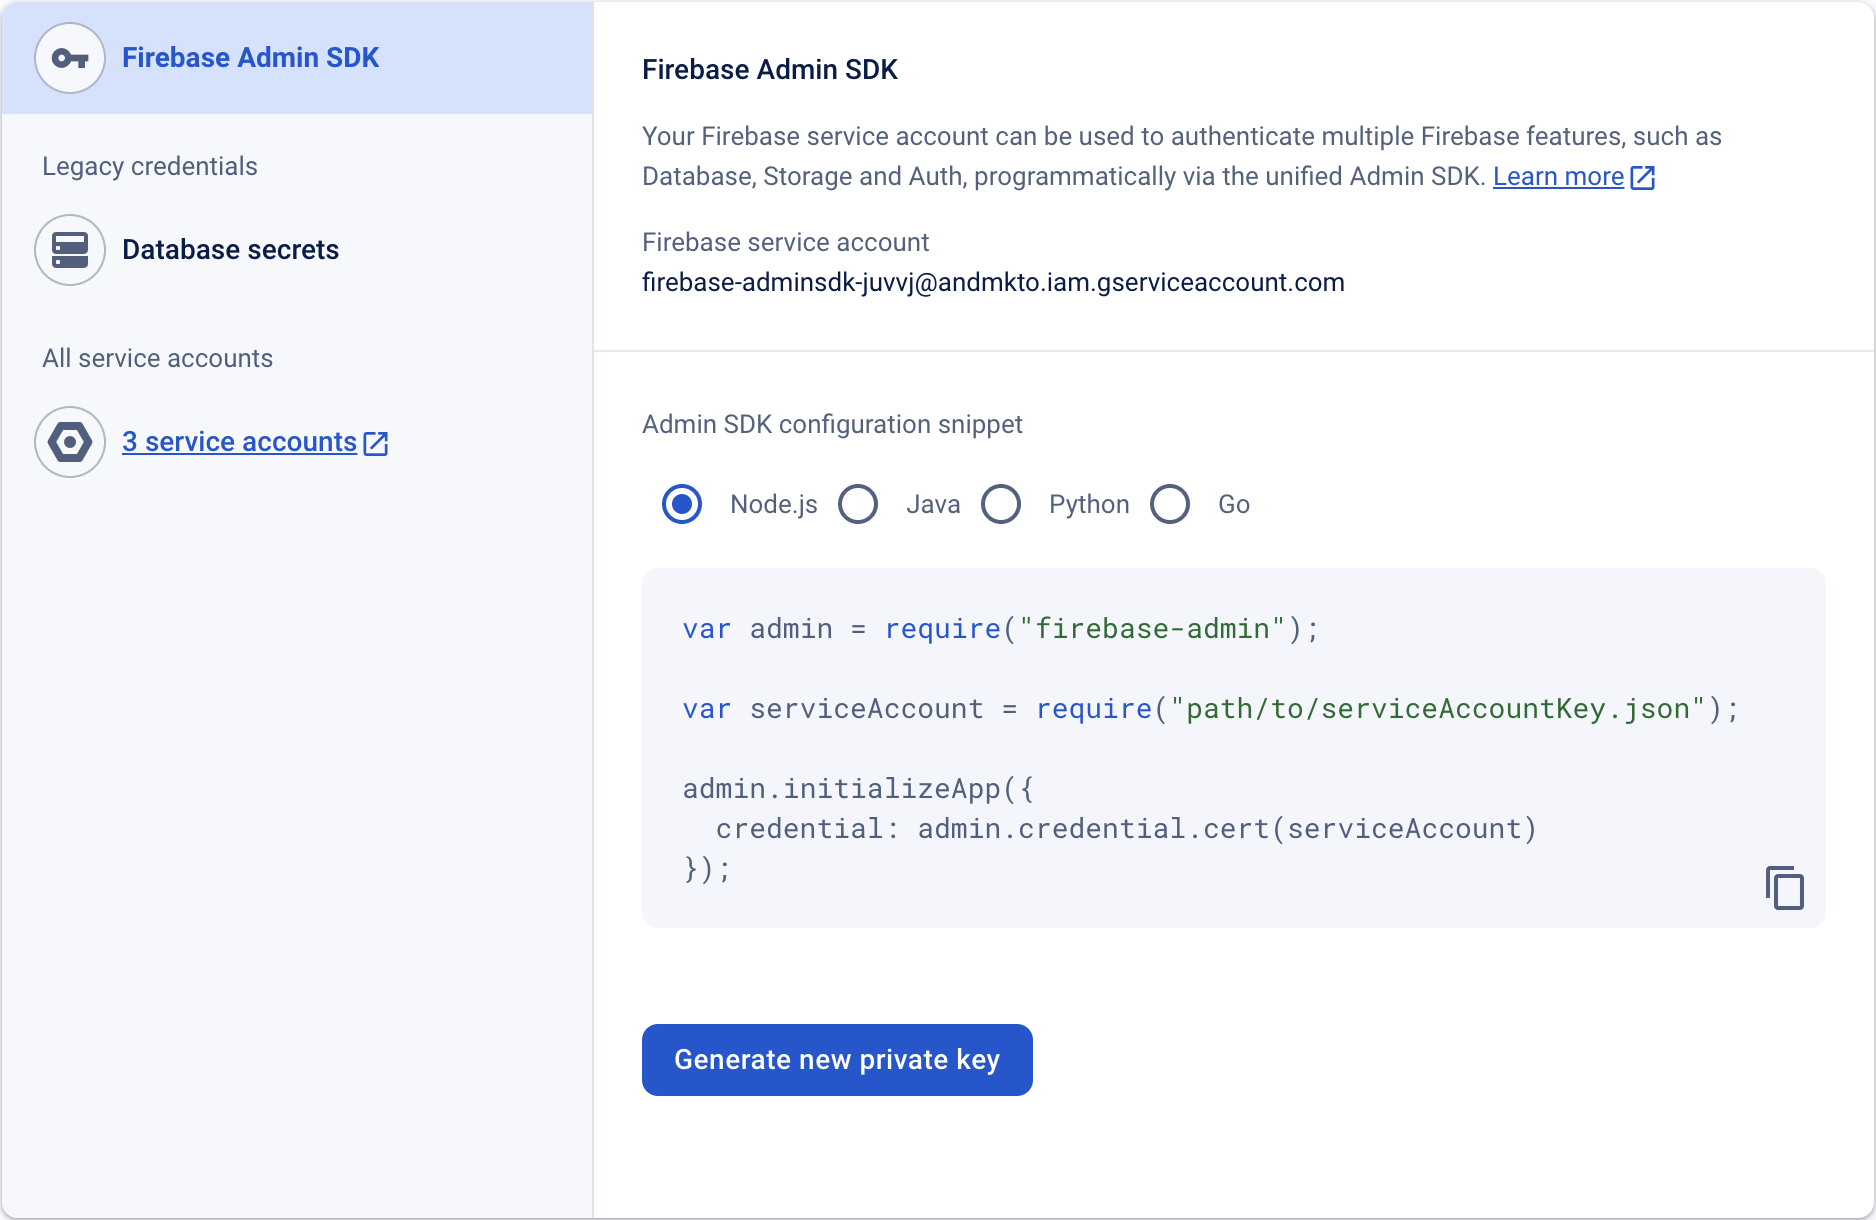
- You can download the Service Account Json file from Firebase Console.
- Wait for an hour after uploading Service Account Json file in Marketo before sending push notifications.
- Enable MME FCM HTTPv1 in Marketo feature manager
Android Test Devices
1. Add Marketo Activity in manifest file inside application tag.
-
12345678<activity android:name="com.marketo.MarketoActivity" android:configChanges="orientation|screenSize"><intent-filter android:label="MarketoActivity"><action android:name="android.intent.action.VIEW"/><category android:name="android.intent.category.DEFAULT"/><category android:name="android.intent.category.BROWSABLE"/><data android:host="add_test_device" android:scheme="mkto"/></intent-filter/></activity/>
Register Marketo Push Service
1. To receive push notifications from Marketo, you need to add the Firebase messaging service to your AndroidManifest.xml. Add before the closing application tag.
123456789<meta-dataandroid:name="com.google.android.gms.version"android:value="@integer/google_play_services_version" /><service android:name=".MyFirebaseMessagingService"><intent-filter><action android:name="com.google.firebase.INSTANCE_ID_EVENT"/><action android:name="com.google.firebase.MESSAGING_EVENT"/></intent-filter></service>
Add Marketo SDK methods in the file MyFirebaseMessagingService as follows
1234567891011121314151617181920import com.marketo.Marketo;public class MyFirebaseMessagingService extends FirebaseMessagingService {@Overridepublic void onNewToken(String s) {super.onNewToken(s);Marketo marketoSdk = Marketo.getInstance(this.getApplicationContext());marketoSdk.setPushNotificaitonToken(s);// Add your code here...}@Overridepublic void onMessageReceived(RemoteMessage remoteMessage) {Marketo marketoSdk = Marketo.getInstance(this.getApplicationContext());marketoSdk.showPushNotificaiton(remoteMessage);// Add your code here...}}
Note – If using Adobe extension, add as below
123456789101112131415161718import com.marketo.Marketo;public class MyFirebaseMessagingService extends FirebaseMessagingService {@Overridepublic void onNewToken(String token) {super.onNewToken(token);ALMarketo.setPushNotificationToken(token);// Add your code here...}@Overridepublic void onMessageReceived(RemoteMessage remoteMessage) {ALMarketo.showPushNotification(remoteMessage);// Add your code here...}}
NOTE: The FCM SDK automatically adds all required permissions as well as the required receiver functionality. Make sure to remove the following obsolete (and potentially harmful, as they may cause message duplication) elements from your app’s manifest if you used previous versions of SDK
12345678910111213<receiver android:name="com.marketo.MarketoBroadcastReceiver" android:permission="com.google.android.c2dm.permission.SEND"><intent-filter><!‐‐Receives the actual messages.‐‐><action android:name="com.google.android.c2dm.intent.RECEIVE"/><!‐‐Register to enable push notification‐‐><action android:name="com.google.android.c2dm.intent.REGISTRATION"/><!‐‐‐Replace YOUR_PACKAGE_NAME with your own package name‐‐><category android:name="YOUR_PACKAGE_NAME"/></intent-filter></receiver><!‐‐Marketo service to handle push registration and notification‐‐><service android:name="com.marketo.MarketoIntentService"/>
2. Initialize Marketo Push
After saving the configuration above, you must initialize Marketo Push Notification. Create or open your Application class and copy/paste the code below. You can get your sender ID from the Firebase console.
1234Marketo marketoSdk = Marketo.getInstance(getApplicationContext());// Enable push notification here. The push notification channel name can by any stringmarketoSdk.initializeMarketoPush(SENDER_ID,"ChannelName");
Note – If using Adobe Launch Extension, use these instructions
12// Enable push notification here. The push notification channel name can by any stringALMarketo.initializeMarketoPush(SENDER_ID,"ChannelName");
If you do not have a SENDER_ID, then enable Google Cloud Messaging Service by completing the steps detailed in this tutorial.
The token can also be unregistered when user logs out.
1marketoSdk.uninitializeMarketoPush();
Note – If using Adobe Launch extension, use the instruction below
1ALMarketo.uninitializeMarketoPush();
Note: To re-register the push token extract the code from step 3 into an AppDelegate method and call form the ViewController login method.
3. Set Notification Icon (Optional)
To configure a custom notification icon the following method should be called.
-
12345678910111213MarketoConfig.Notification config = new MarketoConfig.Notification();// Optional bitmap for honeycomb and aboveconfig.setNotificationLargeIcon(bitmap);// Required icon Resource IDconfig.setNotificationSmallIcon(R.drawable.notification_small_icon);// Set the configuration//Use the static methods on ALMarketo class when using Adobe ExtensionMarketo.getInstance(context).setNotificationConfig(config);// Get the configuration setMarketo.getInstance(context).getNotificationConfig();
Troubleshooting
Setting up mobile push messages involves many steps and the coordination of developers and marketers. If you are experiencing difficulties, there are some simple things that you can check.
After you ensure that the simple things are correct, then you can dig deeper into the programming details.
Push Message is Not Showing Up
First, check to see if push messages are disabled on the handset. Mobile users can control whether or not they receive messages for any particular app. Often developers (and marketers) will disable these messages at some point during development. So the first thing to check is whether the recipient has disabled push messages for your app.
Second, is the app already open and active on the device? When your app is the active app on the device, mobile push messages do not pop up on the screen. Instead, they appear in the “local notifications” area of your app.
View the Activity Logs in Marketo
The first place to look when tracking down an error is in the Marketo Activity logs. You can use activity logs to verify that a message was sent.
In the activity log, look at the activity records for a person that was supposed to receive a message. If the message was sent, there will be a record present in the activity log. If not, the problem is likely due to the configuration of the iOS certificate or Android API key within Marketo.
Certificate or Key is Invalid
Double check your configuration to make sure that you have the proper certificate loaded for Sandbox or Production. Sometimes it is best to have the developer re-export the certificates (iOS) or keys (Android) and then reload them into Marketo to ensure that they are correct.
.p12 file is Missing a Certificate or Key (iOS)
When you export the certificate, make sure that you export the key and the certificate.
Provisioning Profiles Out-of-Date (iOS)
Whenever you add a new device, you need to update your provisioning profiles and generate new certificates. Make sure that your Xcode project then points to the correct profiles and certificates, and import those certificates into Marketo.
Cannot Upload iOS Certificate (IOS)
Ensure that the password used while exporting the certificate does not contain an spaces. For example, instead of this:
“Hello World 123”
use this:
“HelloWorld123”
Troubleshooting iOS Certificates
For sandbox applications, you can use either a “developer” or “universal” certificate. But for production applications you must upload a valid “distribution” or “universal” certificate.
Push Bounce / Invalid Token
An existing registration token may cease to be valid in a number of scenarios, including:
- If the client app unregisters with GCM.
- If the client app is automatically unregistered, which can happen if the user uninstalls the application. For example, on iOS, if the APNS Feedback Service reported the APNS token as invalid.
- If the registration token expires. For example, Google might decide to refresh registration tokens, or the APNS token has expired for iOS devices.
- If the client app is updated but the new version is not configured to receive messages.