Marketo Mobile Extension for Adobe Launch
Installation instructions for Marketo Mobile SDK extension in Adobe Launch. The steps below are required to send Push Notifications and/or In-App Messages.
Prerequisites
- Add an application in Marketo Admin (obtain your application Secret Key and Munchkin Id)
- Follow instructions provided in Adobe Launch portal for installation
- Setup Push Notifications (optional)
iOS
Setup Swift Bridging Header
1. Go to File > New > File and Select “Header File”.
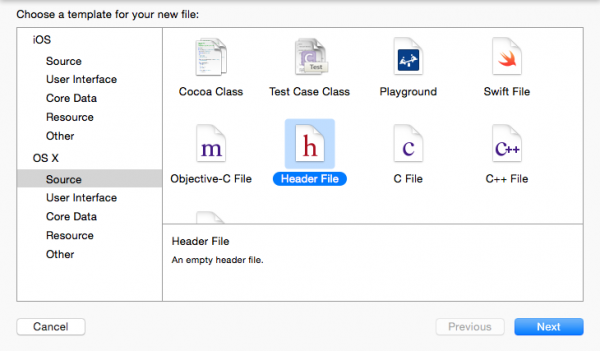
2. Name the file “<ProjectName>-Bridging-Header”.
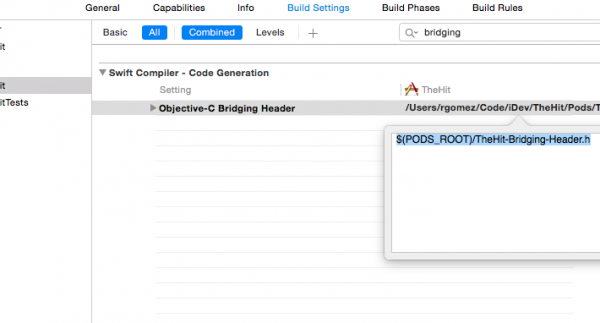
3. Go to Project > Target > Build Phases > Swift Compiler > Code Generation. Add the following path to Objective-Bridging Header:
$(PODS_ROOT)/<ProjectName>-Bridging-Header.h
Please Note:
For Swift users.
Remove the following import statement, as we have added the bridging header already in the above steps.
import Marketo/ALMarketo
iOS Test Devices
Follow instructions at Adding iOS Test Devices
Handle Custom Url Type in AppDelegate
Follow instructions here
Set up push notifications on iOS
Follow instructions here and use the class name “ALMarketo” instead of “Marketo”
Android
Configure Permissions
Open AndroidManifest.xml and add following permissions. Your app must request the “INTERNET” and “ACCESS_NETWORK_STATE” permissions. If your app already requests these permissions, then skip this step.
12<uses‐permission android:name="android.permission.INTERNET"></uses‐permission><uses‐permission android:name="android.permission.ACCESS_NETWORK_STATE"></uses‐permission>
ProGuard Configuration (Optional)
If you are using ProGuard for your app, then add the following lines in your proguard.cfg file. The file will be located within your project folder. Adding this code will exclude the Marketo SDK from the obfuscation process.
123-dontwarn com.marketo.*-dontnote com.marketo.*-keep class com.marketo.**{ *; }
Android Test Devices
Follow instructions here
Set up push notifications on Android
Follow instructions here and use the class name “ALMarketo” instead of “Marketo”
For setting up user profiles follow instructions here and for custom actions follow instructions here. In following instructions, use the classname “ALMarketo” instead of “Marketo”