The Internet of Things (IoT) is the inter-networking of connected devices, appliances, wearables, vehicles, etc. with embedded electronics, software, sensors, and network connectivity that enable these objects to collect and exchange data with cloud information systems. These technologies are growing and trending so fast that they will impact how we live, how we work and how we do business in no time.
Marketo the leading Marketing Engagement Platform is ready for the IoT with its capabilities to scale and interact with any form of communication channel. Marketo can track already over 70 types of activities related to emails, web, mobile, CRM, etc … and it supports also custom activities that can be fed by any 3rd party system. Marketo custom objects make possible to track all kinds of 3rd party metrics related to your business, and allows marketers to leverage those metrics right from Marketo smart campaign filters and triggers.
Implementing IoT for consumers would require a centralized server to interact with consumer devices and this server would exchange data with the Marketo open platform, with capabilities such as REST API, Custom Objects, Custom Activities, etc. – documented here. Not easy to demonstrate via a blog post.
Instead of that, we are going to integrate the IFTTT Service with Marketo in order to implement some cool IoT use cases for the Marketers like:
- Cheering up your Marketing team each time a lead is registering to a road show by blinking a colored light in the office
- Cheering up your Sales team each time a deal is won by automatically firing up a bell plugged to a connected power plug
- Automatically post Marketing success milestones on social networks such as LinkedIn, Facebook, Slack, etc …
- Automatically launch a Marketing Campaign based on:
- when a weather alert occurs (wind, temperature, rain, etc.)
- when a new article is published by a newspaper such as the New York Times, matching some specific criteria
- when the U.S. Senate or House of Representatives votes
- when the International Space Station passes over a certain location
- etc …
You might find those scenarios fun but useless, but they are here to demonstrate a new conceptual way to do Marketing not only with people, but also with things in our connected world.
Another interesting point covered in this article, is how to leverage an open web integration platform such as Zapier as a “serving hatch” between a 3rd party system and Marketo, to manage the authentication for example.
About IFTTT
The IFTTT Service
IFTTT is an acronym for “IF This Then That”. It is a free web-based service that people use to create chains of simple conditional statements, called applets. An applet is triggered by changes that occur within some partner web services and as a result, actions are sent to other partner web services. IFTTT was launched on 2011 by Linden Tibbets, Jesse Tane, Scott Tong, and Alexander Tibbets in San Francisco.
At first sight, IFTTT looks similar to a service like Zapier for example, it has a much stronger focus on consumers and IoT devices (remotes, alarms, lights, thermostats, cars, printers, mobile phones, and so much more).

First of all, you must create an account for IFTTT from the IFTTT web site. Feel free to discover all the cool applets already available as that will give you some other scenarios ideas for sure!
The Maker Channel
A web application that does not have a channel, meaning a partnership with IFTTT, must use the Maker Channel. With the Maker Channel, you can create Applets that work with any device or app that can make or receive a web request. It offers the following integrations:
- Inbound Triggers to receive web request from a 3rd party system in order to trigger an action
- Outbound Actions to make a web request to a 3rd party system publicly accessible on the Internet
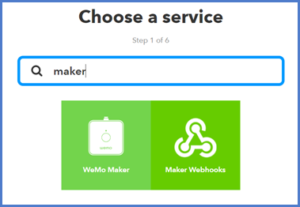
From IFTTT, search for the “Maker” service and click on it.
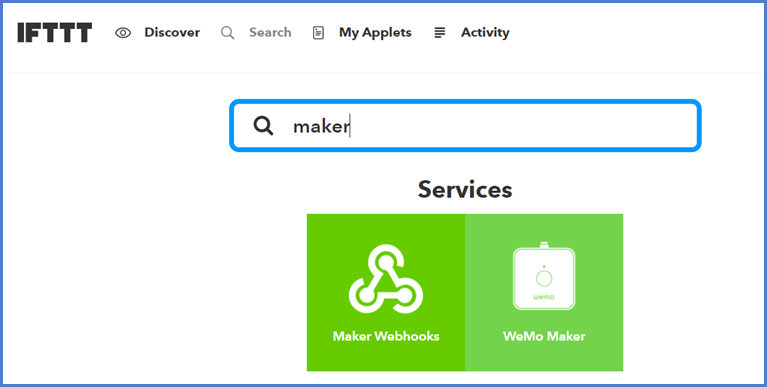
The first time, you will need to activate it by clicking on the “Connect” button.

Now the Maker Channel is active.
You can obtain your secret key by clicking on the Maker Settings button:
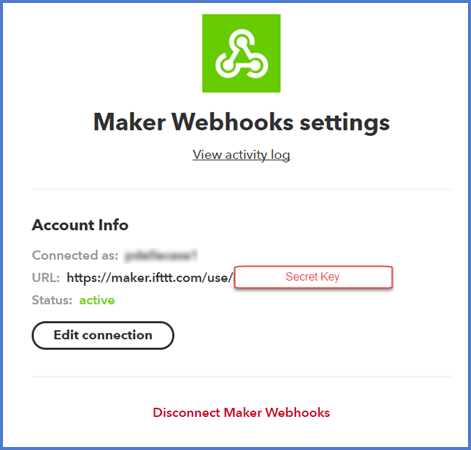
Copy and paste the provided URL to your browser for more details.
Triggering Directly an IFTTT Action from Marketo
First, we are going to focus on triggering all kinds of 3rd party web service actions from Marketo. For that we are going to use a Marketo Webhook. We’ll start with a push message on your mobile phone or tablet via the IFTTT mobile app, and then we’ll implement a IoT scenario blinking a Philips Hue light.
Marketo Webhook
To trigger an event from Marketo, acting as the “if” of IFTTT, is simple. All you need to do is send a POST web request to IFTTT with an event name and your secret key, following this pattern URL:
https://maker.ifttt.com/trigger/{event_name}/with/key/{secret_key}
The Maker makes it also possible to communicate up to 3 parameters via the web request. This can be done using query parameters,
https://maker.ifttt.com/trigger/{event_name}/with/key/{secret_key}?value1={value1}&value2={value2}&value3={value3}
or using a JSON body consisting of up to three values:
{
“value1” : “{value1}”,
“value2” : “{value2}”,
“value3” : “{value3}”
}
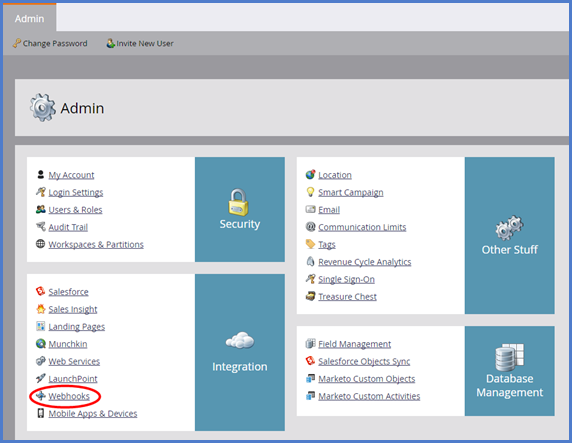
In Marketo, create a new Webhook from the Admin interface.
Provide the following information for your new Webhook:
Webhook Name: IFTTT Program Success
Description: Trigger an event on IFTTT from a Smart Campaign for a Program Success
URL: https://maker.ifttt.com/trigger/{event_name}/with/key/{secret_key}?value1={{program.name}}&value2={{lead.Email Address}}&value3={{lead.Full Name}}
event_name, use MarketoProgramSuccess for example
secret_key, use the secret key from your IFTTT Maker Service
Use static text or Marketo tokens for the three available values. You can push more interactive messages by defining your own tokens at the program level and pass them through these values.
Request Type: POST
Template: Leave blank
Request Token Encoding: Form/Url
Response type: None
No need to define a response mapping.
IFTTT Applet
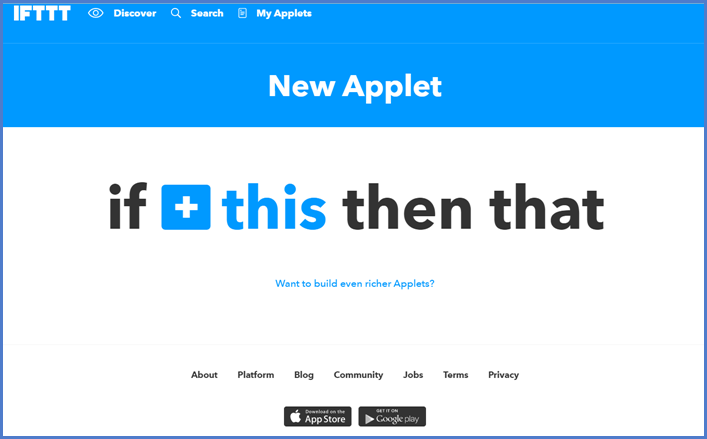
In IFTTT web portal, select “My Applets” in the main menu.

Click the button “New Applet” and click on the section +this.
Search for the Maker service.
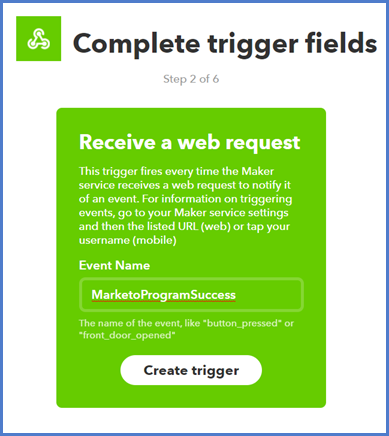
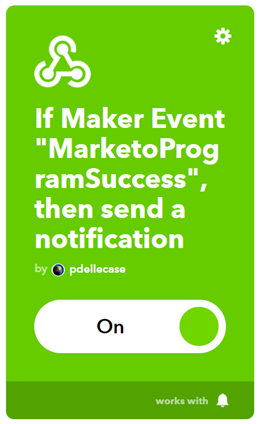
Create the Trigger that will fire every time the Maker service receives a web request to notify it of an event.
Use the same Event Name as the one specified in the URL of your Marketo Webhook, e.g. “MarketoProgramSuccess” and click the “Create trigger” button.
Now it is time to specify the Action Service by clicking the section +that.

We are going to start with a simple action service that anyone would be able to test without having to invest in any IoT devices, the Notifications Service.
Search for and select the Notifications Service.

Choose the action “Send a notification” that will send a notification to your devices.
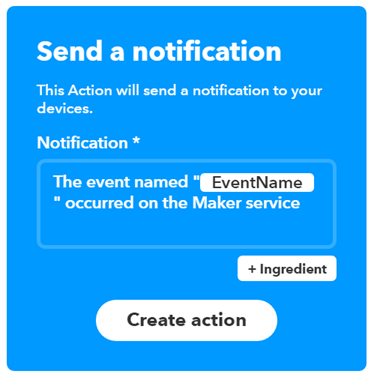
You can leverage the 3 values you have sent from Marketo by adding them as Ingredients in order to deliver a meaningful notification to the user, just like the example below …
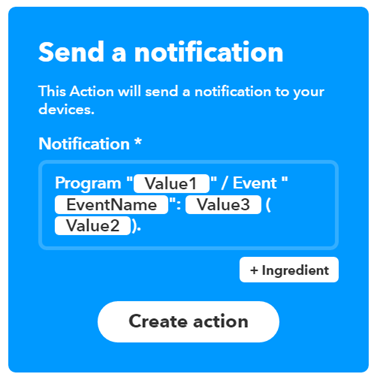
And then click the button “Create action”.
Review and finish the IFTTT Applet. Make sure it is enabled.
Testing the IFTTT Applet
If you want to get notified on your Mobile, you must first download the IFTTT app for your device.
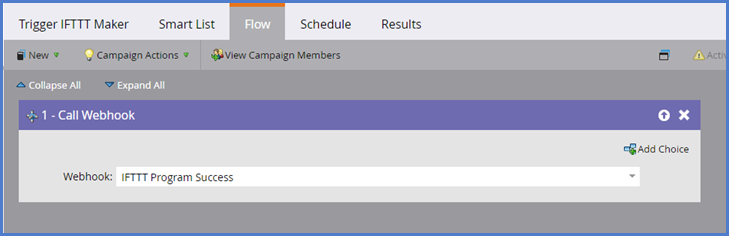
You can trigger a Marketo Program Success event by using the Webhook in a Marketo Smart Campaign Flow. Remember that Marketo Webhooks work exclusively with triggered Smart Campaigns (e.g. trigger once a contact filled-out form, was added to a list, etc.).
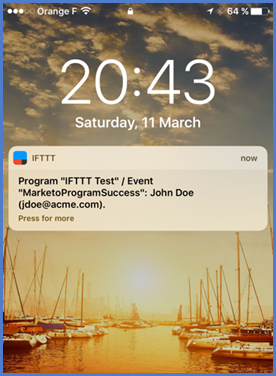
And here is an example of an IFTTT notification on your mobile phone.
Let’s Get Creative with IFTTT
IFTTT offers Applet Actions with over 300 partners, so your portfolio of apps and appliances together with your imagination are the limits …
Let’s take an example with the Hue lights from Philips that you can buy anywhere in electronics shops or online.
The following applets would blink one of your lights with its current assigned color when Marketo triggers a program success, that could boost your marketing team in the office.
We create a new Applet, following the same steps as before, where Marketo is triggering with a webhook, but this time we choose the action from Philips Hue service.
Let’s select the “Blink lights” action.
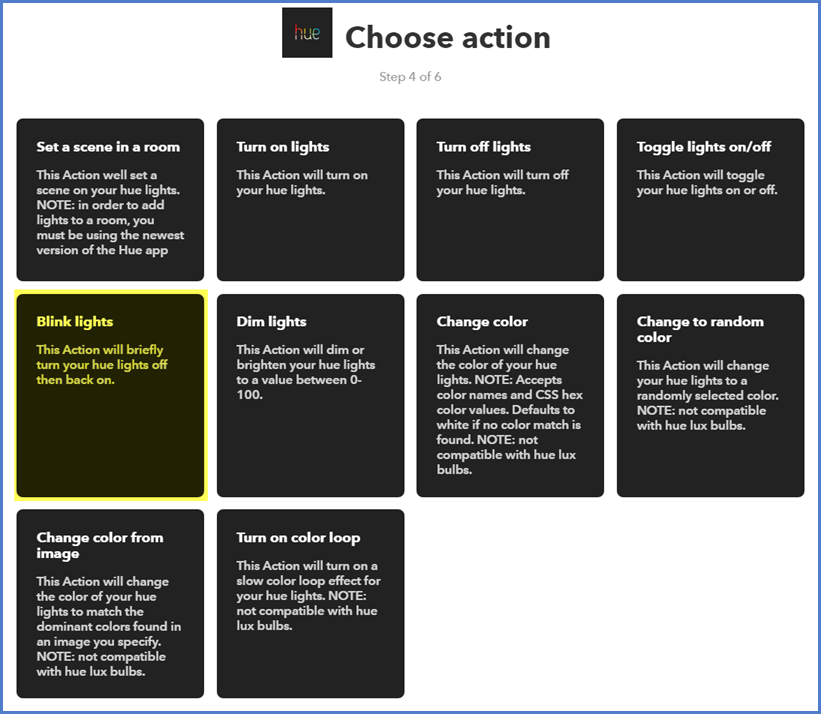
The app will request from Philips Hue all your available lights, so you can pick the one to blink. You would need to set up an account with Philips Hue first, the Hue bridge and of course at least one Hue bulb, light strip, projector or lamp.
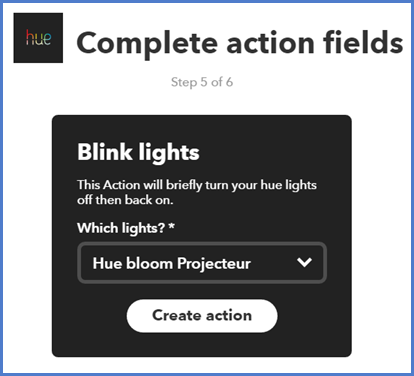
We just added a new Applet that will blink a colored light each time a lead is registering to a roadshow or webinar. Your Marketing team will cheer up every day with that setup in the office.
Executing a Marketo Action from IFTTT, via Zapier
Now, we are going to trigger a Marketo Smart Campaign from the IFTTT Platform. For that we are going to use the Marketo REST API. Since this API is secured and requires an OAuth2 Authentication prior to invoke anything, we need to handle that authentication via another platform such as Zapier, because IFTTT doesn’t allow to chain two consecutive calls on an API with the Maker Channel.
We picked Zapier web app Automation Service since we published already this blog post introducing Zapier and explaining step by step how to implement a custom Marketo connector for Zapier. Other platforms such as Workato could be a solution too.
Marketo Campaign
Create your Marketo Program with a scheduled Smart Campaign.
For test purpose, you could create the following Smart Campaign as an example:
Smart List
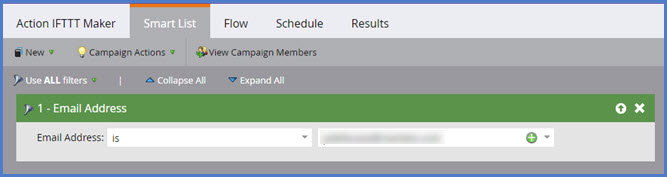
Use only filters, not triggers. Make sure at least you would qualify.
Flow
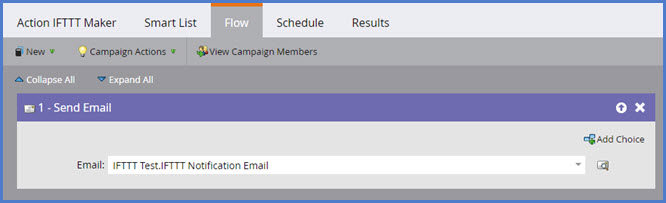
Send you an email or any another kind of notification.
Schedule

Make sure you can run through the flow every time in order to handle your multiple tests.
You can obtain the Smart Campaign Id from the URL. Example: https://{{marketo_url}}/#SC4289A1 – the Smart Campaign Id would be 4289.
You can trigger this campaign via the Marketo REST API. You can use for example the Postman plugin for Chrome and send the 2 following consecutive HTTPS calls:
Authentication step:
https://{{Your Munchkin_Account_id}}.mktorest.com/identity/oauth/token?grant_type=client_credentials&client_id={{Your_Client_Id}}&client_secret={{Your_Client_Secret}}
Recover the access token from the JSON response.
Campaign kick-off step:
https://{{Your_Munchkin_Account_id}}.mktorest.com/rest/v1/campaigns/{{Campaign_Id}}/schedule.json?access_token={{access_token}}
Intermediate Zapier Custom Connector to Launch the Marketo Campaign
We need to build a custom Zapier connector that authenticates with the Marketo REST API and kicks off our Smart Campaign. For that we are re-iterating all the following steps from our previous article ‘Seamless Integration with Marketo and over 500 Apps using Zapier’:
- Prerequisites
- Implementation of the Marketo Connector for Zapier
- Use a different title such as “Marketo Campaign”
- Do the “Authentication” step
- Do the “Triggers” step (required for Zapier testing purpose)
- Do the following specific “Actions” step, responsible to launch a Marketo campaign, explained below:
Action
Click Add New Action to start the wizard and fill-up the following fields (fields not mentioned can be left blank):
Name and Description
| Name | Noun | Key | Description | Important? | Hide? |
| Launch Campaign | Campaign | launch_campaign | Launch a Smart Campaign in Marketo | Checked | Not Checked |
Action Fields
| Label | Key | Type | Required? |
| Campaign Id | CampaignId | Unicode | Checked |
Where to Send Data
Action Endpoint URL :
https://{{munchkin_account_id}}.mktorest.com/rest/v1/campaigns/{{CampaignId}}/schedule.json
Leave blank the other optional fields.
Scripting API
Zapier’s scripting feature allows you to manipulate the requests and responses that are exchanged between your app’s API and Zapier. You can modify HTTP requests just before they are sent and can parse responses before Zapier does anything with them. We need it in order to complete our custom ‘Session Auth’ authentication. More information is available on the original article.
Copy the following code very similar to the original, we just changed the action methods:
|
1 2 3 4 5 6 7 8 9 10 11 12 13 14 15 16 17 18 19 20 21 22 23 24 25 26 27 28 29 30 31 32 33 34 35 36 37 38 39 40 41 42 43 44 45 46 47 48 49 50 51 52 53 54 55 56 57 58 59 60 61 62 63 64 65 66 67 68 69 70 71 72 73 74 75 76 77 78 79 80 81 82 |
var Zap = { get_session_info: function(bundle) { console.log('Entering get_session_info method ...'); var access_token, access_token_request_payload, access_token_response; // Assemble the meta data for our Access Token swap request console.log('building Request with client_id=' + bundle.auth_fields.client_id + ', and client_secret=' + bundle.auth_fields.client_secret); access_token_request_payload = { method: 'POST', url: 'https://' + bundle.auth_fields.munchkin_account_id + '.mktorest.com/identity/oauth/token', params: { 'grant_type' : 'client_credentials', 'client_id' : bundle.auth_fields.client_id, 'client_secret' : bundle.auth_fields.client_secret }, headers: { 'Content-Type': 'application/json', // Could be anything. Accept: 'application/json' } }; // Fire off the Access Token request. access_token_response = z.request(access_token_request_payload); // Extract the Access Token from returned JSON. access_token = JSON.parse(access_token_response.content).access_token; console.log('New Access_Token=' + access_token); // This will be mixed into bundle.auth_fields in future calls. //bundle.auth_fields.access_token=access_token; return {'access_token': access_token}; }, test_trigger_pre_poll: function(bundle) { console.log('Entering test_trigger_pre_poll method ...'); bundle.request.params = { 'access_token':bundle.auth_fields.access_token }; return bundle.request; }, test_trigger_post_poll: function(bundle) { console.log('Entering test_trigger_post_poll method ...'); var data = JSON.parse(bundle.response.content); if ((!data.success)&&((data.errors[0].code=="601")||(data.errors[0].code=="600"))){ console.log('Access Token expired or invalid, requesting new one - data.success=' + data.success + ', data.errors[0].code=' + data.errors[0].code); throw new InvalidSessionException(); // Calling get_session_info() to regenerate Access Token } return JSON.parse(bundle.response.content); }, launch_campaign_pre_write: function(bundle) { bundle.request.params = {'access_token':bundle.auth_fields.access_token}; return bundle.request; }, launch_campaign_post_write: function(bundle) { var data = JSON.parse(bundle.response.content); if ((!data.success)&&((data.errors[0].code=="601")||(data.errors[0].code=="600"))){ console.log('Access Token expired or invalid, requesting new one - data.success=' + data.success + ', data.errors[0].code=' + data.errors[0].code); throw new InvalidSessionException(); // Calling get_session_info() to regenerate Access Token } return JSON.parse(bundle.response.content); } }; |
New Zap
From the Zapier Dashboard click the button “Make a new Zap”.
Trigger
- Pick the “Webhooks by Zapier” Trigger App
- Check “Catch Hook”
- No need to pick off a child key
- Zapier generated a custom webhook URL for you to send requests to, keep it safe somewhere
- Test the webhook URL, by starting the “IFTTT Applet that calls the Zapier Webhook” scenario below. That will allow Zapier to learn about the webhook payload and to let you assign the campaign Id to the Action
Action
- Select the Marketo Campaign connector previously created
- Choose the only action available: Launch Campaign
- Connect to your Marketo account, filling up the authentication parameters (Munchkin Account Id, Client Id, Client Secret)
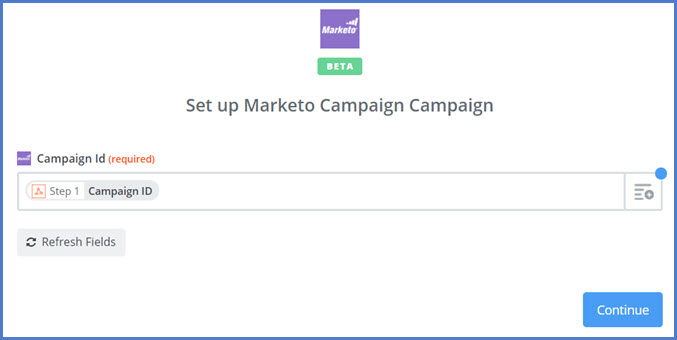
- Edit the Template and associate the Campaign ID from the Trigger to the “Launch Campaign” Campaign Id parameter
- Test the step and check that the Marketo Campaign get launched
IFTTT Applet that Calls the Zapier Webhook
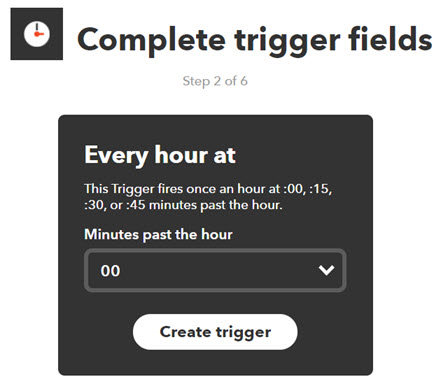
We start with a simple scenario that is easy to test. We pick in IFTTT a Date & Time trigger that will kick off the Marketo Campaign every hour.
The Action is a web request posting to the Zapier Webhook URL and passing over the Smart Campaign Id.
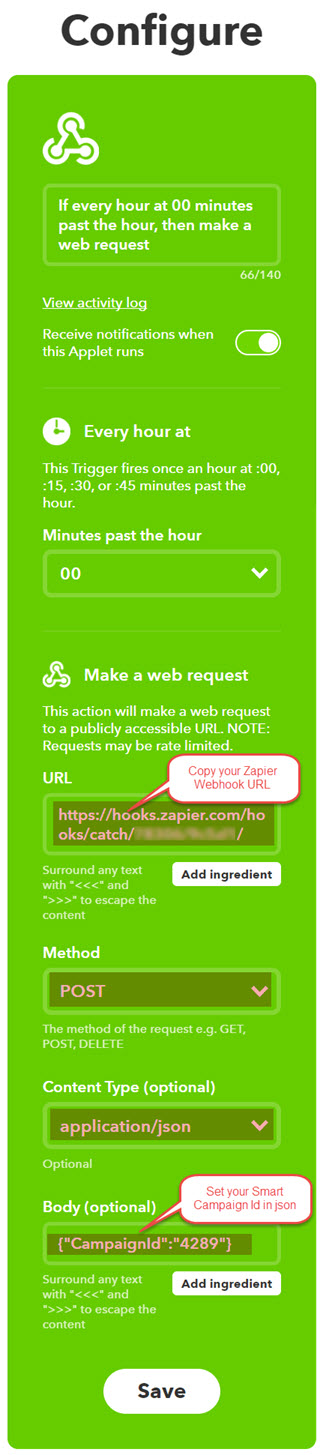
Make sure the Zapier Zap and the IFTTT Applet are both active and test everything is working as expected.
Let’s get Creative with IFTTT
IFTTT offers Applet Triggers with over 300 partners, so again your portfolio of apps and appliances together with your imagination are the limits …
Let’s take an example with the Weather Underground service that we are going to use to launch our Marketo campaign on weather alert.
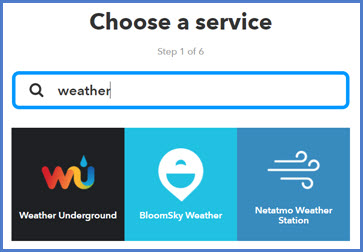
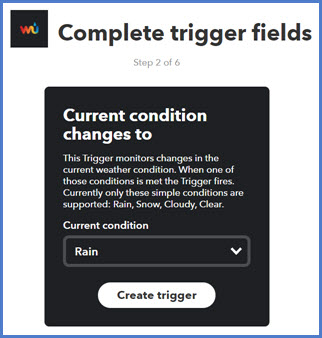
The following trigger would kick-off when a Rain condition is announced.
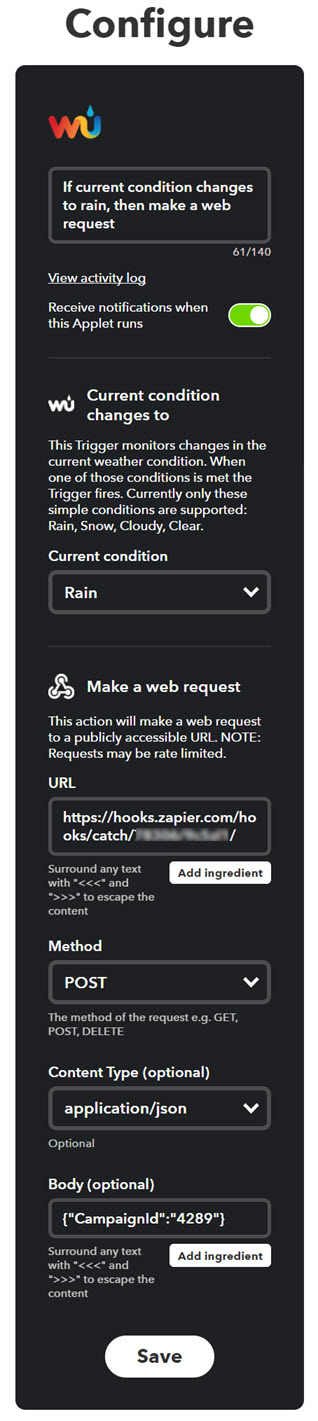
And then associate the Trigger with the Maker Webhook Action, and just like previously fill in the Zapier webhook parameters.
Et voila, you just need now a good rain to come to double check this is actually working.
Conclusion
We hope you’ll have a lot of fun applying the concepts provided in this article. But most important, we think it will help anybody wanting to integrate Marketo with other 3rd party systems, thanks to the key concepts from this article:
- Marketo REST API
- Marketo Webhooks
- How to leverage an open web integration platform such as Zapier as a “serving hatch” between a 3rd party system and Marketo, to manage the authentication for example